Before rotation gets fast, it has to get right — these seven kettlebell drills develop thoracic mobility, motor control, and rotational strength under control.
Anti-rotation teaches the trunk to resist twist under load. Explosive rotation produces twist at speed. Between them sits the category many programs skip — controlled rotation, where the body learns to produce rotation deliberately, slowly, and through a defined range before speed or power enter the picture.
Motor control before speed. That principle governs every exercise in this article. A windmill performed with correct thoracic rotation and a neutral lumbar spine builds the mobility and strength that a rotational snatch later depends on. A wood chop lowered slowly through the eccentric phase develops deceleration control that may help manage fast direction changes. The seven controlled rotation kettlebell exercises below are not a warm-up for explosive work — they are the skill-acquisition phase that makes explosive work trainable.
Readers with a history of spinal injury, disc herniation, chronic low back pain, shoulder instability, or pain with overhead loading should consult a qualified professional before beginning rotational kettlebell training.
What Controlled Rotation Trains
Controlled rotation develops three qualities simultaneously.
First, thoracic mobility — the ability of the upper back to rotate through its available range under load. Without sufficient thoracic rotation, the lumbar spine may compensate, and rotational exercises that follow may train the wrong segment.
Second, rotational motor control — the ability to rotate through the right joints in the right sequence. The hips initiate when the exercise calls for hip-driven rotation, the thoracic spine turns, and the lumbar spine stays controlled. This sequencing is a skill, not an instinct, and it has to be practiced slowly before it can be expressed at speed.
Third, rotational strength under control — the ability to hold position, maintain range, and resist compensation while the body turns. A windmill at the bottom position demands strength through a long lever arm. A wood chop descent demands eccentric control to manage the bell’s momentum. Neither is about how much weight the lifter can move. They are about how much range and control the lifter can maintain.
The distinction from the other two categories is clear. Anti-rotation resists external rotation. Explosive rotation produces rotation at speed. Controlled rotation produces rotation deliberately and slowly — building the capacity that both of the other categories depend on.
A Simple Thoracic Mobility Self-Check
Before loading rotation, the reader should know whether their thoracic spine has enough range to rotate under load without forcing the lumbar spine to compensate.
A simple check: sit on a bench or chair with feet flat on the floor. Cross the arms over the chest or hold a stick across the shoulders. Without moving the hips or lifting the feet, rotate the torso to one side as far as it will go comfortably. Then rotate to the other side.
Two things to notice. First, whether one side is noticeably more restricted than the other — a significant asymmetry suggests a mobility limitation worth addressing before adding load. Second, where the rotation is felt. If the twist pulls into the lower back rather than turning through the upper back, thoracic mobility may be the limiting factor.
This is a self-check, not a diagnosis. If the rotation feels even and comes from the upper back, the reader is ready for the drills below. If one side is restricted or the lower back is doing the work, thoracic mobility exercises — foam rolling the upper back, open-book stretches, quadruped rotations — should precede loaded rotation work.
The 7 Drills
Use light loads and stop if rotation causes lower-back pain, pinching, shoulder pain, or symptoms that travel into the hip or leg.
1. Kettlebell Windmill
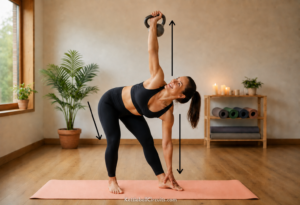
Stand with feet wider than shoulder width, toes angled away from the working side. Press or hold the kettlebell overhead on one side. Hinge at the hips and rotate the torso, sliding the free hand down the inside of the opposite leg while keeping the overhead arm locked and the eyes on the bell.
Cue: The rotation comes from the thoracic spine. The hinge comes from the hips. The lumbar spine stays neutral between them. Eyes stay on the bell throughout.
Common error: Rounding the lower back or letting the overhead arm drift forward. Both indicate the weight is too heavy or the hip hinge is too shallow. Reduce the load and prioritize depth through hip flexion, not spinal flexion.
What it trains: Thoracic rotation, hip mobility, and overhead shoulder stability in one movement. The windmill is widely taught but rarely with enough emphasis on where the rotation should occur. If the lumbar spine is doing the rotating, the exercise is not training what it is supposed to train.
2. Kettlebell Wood Chop
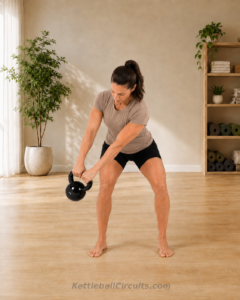
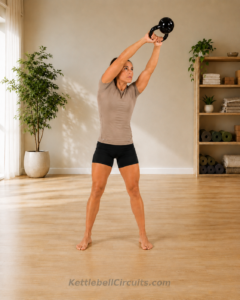
Hold the kettlebell with both hands. Starting from one hip, drive diagonally across the body to the opposite shoulder, or move from one shoulder down toward the opposite hip. Keep the movement slow and controlled rather than swinging the bell with momentum.
Cue: The trunk and hips guide the bell through the diagonal path. The arms connect the body to the kettlebell; they do not yank the weight across the body.
Common error: Pulling the bell with the arms while the trunk stays passive, or rounding the lower back during the low position. The chop is a trunk-and-hip coordination exercise — if the arms do all the work, the training effect is lost.
What it trains: Diagonal trunk control, oblique strength, hip rotation, and eccentric control. The lowering phase matters: slow the descent rather than letting the bell fall.
3. Half-Kneeling Kettlebell Chop
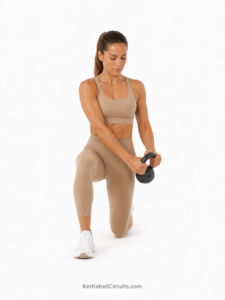
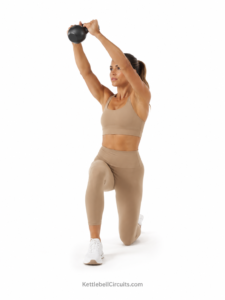
Set up in a half-kneeling position with one knee on the ground and the opposite foot planted in front. Hold the kettlebell with both hands. Move the bell diagonally across the body while keeping the pelvis controlled and the ribcage stacked over the hips.
Cue: The half-kneeling position removes much of the lower-body momentum. Rotate and control the diagonal path without letting the hips sway or the low back twist.
Common error: Leaning, arching, or shifting the hips to move the bell. If the pelvis moves more than the trunk, the load is too heavy or the range is too large.
What it trains: Controlled diagonal trunk rotation from a constrained lower-body position. This is a cleaner, more controlled variation of the wood chop for readers who need to slow the pattern down and reduce momentum.
4. Standing Russian Twist
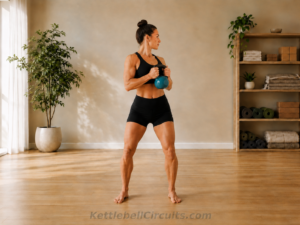
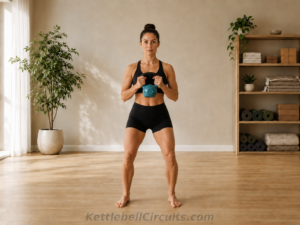
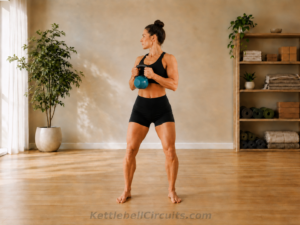
Stand with feet hip-width apart, holding the kettlebell at chest height with both hands. Rotate the torso to one side, pause, and rotate to the other.
Cue: The rotation comes from the thoracic spine. The hips stay relatively stable, the feet stay planted, and the lumbar spine stays neutral. Use a light bell and a slow tempo.
Common error: Rushing the tempo or using a bell heavy enough to force compensation. This exercise is about controlled thoracic rotation, not about how much weight can be twisted side to side.
What it trains: Controlled thoracic rotation with a braced core. The standing position makes it easier to keep the lumbar spine neutral than the seated, flexed version. See the section below for why the distinction between the two versions matters.
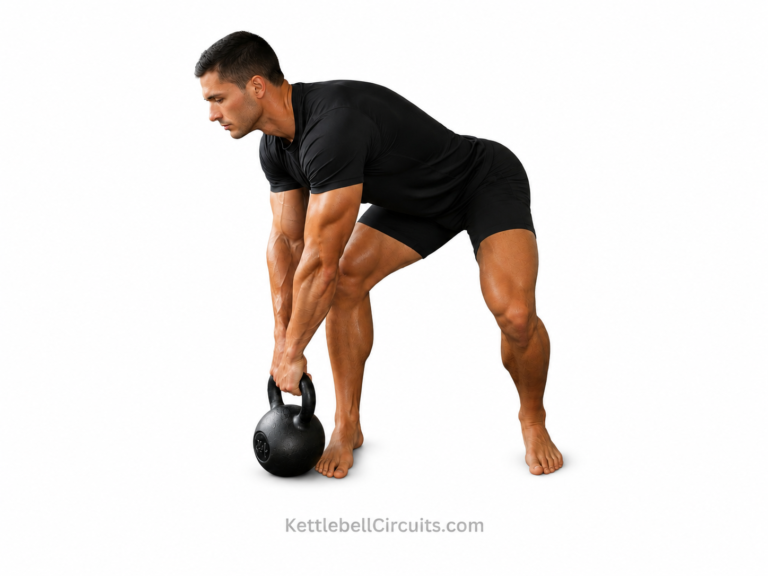
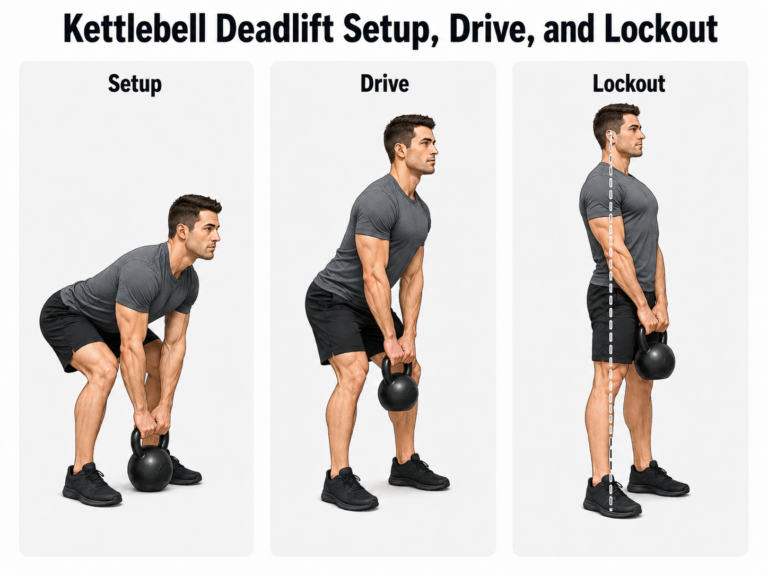
5. Rotational Deadlift
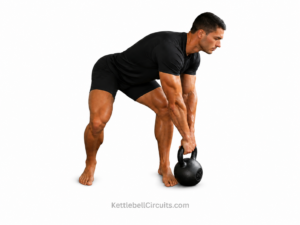
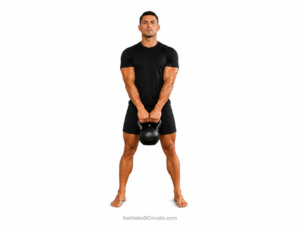
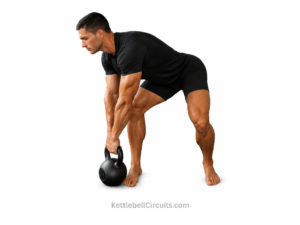
Place the kettlebell slightly outside one foot. Hinge at the hips to grip the bell, then stand, allowing a small controlled rotation of the torso as the bell travels from the offset position toward the midline.
Cue: The hips drive the lift. The rotation is a consequence of the offset bell placement, not a forced twist. Brace the spine throughout — the lumbar spine stays neutral even though the torso rotates slightly.
Common error: Forcing a deep twist at the bottom of the hinge, or rounding the lower back to reach a bell placed too far to the side. The rotation should be mild and natural. If it feels like a twist, the setup is too aggressive.
What it trains: The ability to hinge and manage a rotated setup under load with a braced spine. This movement pattern appears in many sport and daily tasks that involve picking something up from an angle.
6. Kettlebell Bent Press
🖼️ IMAGE PLACEHOLDER: Kettlebell Bent Press
Start with the kettlebell in the rack position. Turn the feet slightly away from the loaded side, keep the forearm vertical, rotate through the thoracic spine, and shift the hips back as the torso lowers under the bell. The arm straightens as the body moves away from the weight, then the lifter stands up with the bell locked out overhead.
Cue: You are not pressing the bell straight up. You are moving your body under and away from the bell.
Common error: Treating this like a normal overhead press, forcing lumbar rotation, losing the vertical forearm, or loading it heavily before the pattern is solid.
What it trains: Controlled rotation, hip shift, thoracic mobility, overhead stability, and full-body coordination. This is an advanced drill. Readers who cannot maintain shoulder control, a neutral lumbar spine, and a slow tempo should skip it until those prerequisites are in place.
7. Kettlebell Lunge With Rotation



Step into a forward or reverse lunge while holding the kettlebell at chest height. At the bottom of the lunge, rotate the torso toward the lead leg. Return to center before standing.
Cue: The split stance anchors the hips while the thoracic spine rotates deliberately. The rotation should be smooth and controlled. If the lumbar spine rounds or the hips shift, reduce the lunge depth or lighten the weight.
Common error: Rotating before reaching the bottom of the lunge, or rotating so aggressively that the hips shift and the lower back rounds. The lunge establishes the stable base; the rotation happens within that base, not against it.
What it trains: Controlled thoracic rotation under a single-leg stability demand. The split stance challenges balance and hip stability while the rotation adds a transverse-plane load — two demands the body must manage simultaneously.
The Russian Twist — Risky Version vs. Useful Version
The Russian twist appears in many core-exercise lists. It also appears in many exercises-to-avoid lists. Both positions can be true because they are often talking about two different movements that share a name.
The risky version is performed seated on the floor, often with the feet elevated, the spine flexed, and a heavy weight twisted side to side rapidly. Combining spinal flexion with loaded torsion may increase stress on the lumbar spine, especially when performed quickly or with poor control. The speed masks compensations that a slow tempo would expose, and the flexed position makes it harder to keep the lumbar spine neutral.
The useful version — the standing Russian twist described in exercise 4 above — keeps the spine upright, the lumbar region neutral, and the rotation controlled. A light bell, slow tempo, and standing position substantially change the risk profile.
The difference between the two versions is not subtle, and the reader should know which one they are performing. If the lower back is flexed and the rotation is fast, it is the risky version regardless of what the workout calls it. If the spine is upright, the lumbar region is neutral, and the rotation is slow and deliberate, it is the useful version.
Programming Controlled Rotation in a Training Session
Controlled rotation kettlebell exercises fit best in the accessory block — after the main strength work, before conditioning. They develop thoracic mobility and rotational motor control without competing with the primary lifts for energy or neural drive.
Tempo is the priority, not load. Slow, deliberate reps where the lifter controls the range and maintains spinal mechanics produce the training effect. Fast or heavy reps that force compensations defeat the purpose. Lighter than expected is almost always correct for windmills, wood chops, half-kneeling chops, Russian twists, and lunges with rotation.
Pairing controlled rotation with anti-rotation in the same session is a practical structure. A set of cross-body carries followed by windmills trains trunk stiffness and thoracic mobility in the same block. A set of plank drags followed by wood chops trains stability and rotational strength.
Volume: 3–4 sets of 6–10 reps per side, with a focus on tempo and range over load. Two to three sessions per week with controlled rotation work is sufficient.
For the bent press, use lower volume: 2–3 sets of 2–5 controlled reps per side. The bent press is a skill lift, not a conditioning drill.
When to Progress to Explosive Rotation
Controlled rotation proficiency looks like this: the windmill can be performed through a comfortable controlled range with correct spinal mechanics — thoracic rotation without lumbar compensation. The wood chop descent is controlled — the bell does not fall through the eccentric phase. The lunge with rotation stays balanced without knee collapse, hip shift, or lumbar rounding. The self-check from earlier in this article shows symmetrical thoracic rotation without lower-back pull.
When these benchmarks are met, the reader is ready to add explosive rotation — exercises where the hips, feet, and trunk produce rotation at speed. This does not mean stopping controlled rotation work. It means adding explosive rotation alongside it. The windmills, chops, rotational deadlifts, and lunges that built the mobility and motor control continue to maintain them.
The next step in the progression is Explosive Rotation Kettlebell Exercises — 4 Drills for Hip-Driven Transverse Power.